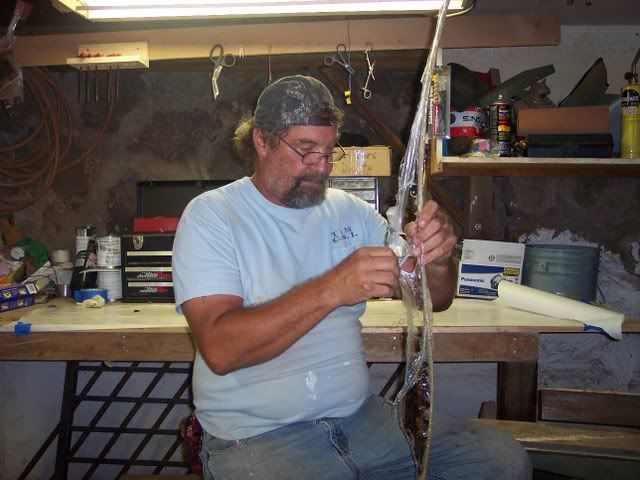
Announcement

Collapse

TBH Maintenance


TBH maintenance - There will be interruptions this weekend as we prepare for a hosting switchover.
See more
See less

Longbow build.....is under way

Collapse
X
 
  • Filter
  • Time
  • Show
Clear All
new posts

    #31
    hey Mark,
    It's me keawe. I was wandering what site u buy ur bow materials from? i can only post visitor messages and post replies. no pm's yet.

    Comment


      #32
      I just luv this stuff!
      Every time I think I would like to build a bow I get to thinking how much money I would have to invest in tools, sanders, band saw, a million C-clamps etc etc.
      I figure the first bow would cost me about 4 grand and even then it probably would be a piece of junk. When you think about it, $500 is a really good deal on a custom bow. One has to really appreciate what goes into one of these master crafted bows.

      Comment


        #33
        Being a carpenter, I was lucky to have most of the tools of my trade when I started playing with bows.
        But a good jig saw and a portable belt sander will get the job done. Before I had my table sander I mounted my belt sander upside down in a vise.

        As for the clamps?.... gift cards are the ticket !! Sears gift cards or Home despite(depot) people think they are impersonal. No the tie or pair of socks are. JMHO.

        But yes you are correct, buying a bow from Bob is the ticket...he does his a little different than I do, I can't tell ya what it is because I'm sworn to the Bowyers code.

        I should of given the Warning first before the build....

        "Danger, bow building is very addictive"


        Aloha Keawe

        Glad to meet you and shoot with you on sunday. It all depends some riser wood I cut myself here in Hawaii, some I get from West Pennshardwood in New York,
        The lams I sometimes grind myself like I did for this bow, or buy them from Binghams, 3 Rivers, or Kenny Makenny. the glass I order from Binghams.

        Keawa (key-ah-vey) is the son of a friend of mine that just discovered the wonderful world of styks... I'm sure we'll be building a bow or two real soon.

        This evening we should be able to pull the bow out and come real close to finishing it up.

        Comment


          #34
          Looking good!

          Comment


            #35
            my wife doesnt like you

            i told her i was gonna try to build a bow and she just goes hmmph

            cant wait to see the finished product.... would love to see how you built the form but since you said youve had this one for ten years it not possible.

            one other question could i build the recurve form that you made and use c-clamps on it and it work also or does that need to be the hose methos to work better?

            Comment


              #36
              Any plans for building the laminating oven? I have priced the heatstrips and they are very high $$$.

              Comment


                #37
                Yep heat strips are out ragous.
                You can build a simple oven out of 2 inch styrofoam. Make the sides and ends 18 inches tall, the top 24 inches wide by 7 feet long. Duct taped together for easy take apart and storage
                Your heat source can be 2 pieces of plywood 6 inches wide and 4 feet long with 4 lights bases wired on each, just lay it in beside the press. with 100 watt lights in each.

                I have a pic of a buddies oven I'll see if I can post it.

                Comment


                  #38
                  Aloha Mark, Mahalo again for such a great follow along.

                  Mahalo nui loa
                  Jon

                  Comment


                    #39
                    Lets get it out and see what we have.
                    Oh wow this is a long long build, grab a cold one !
                    Ok, it’s been a long cool down time. So lets see what we have. This is the exciting part.


                    Yep looks like a longbow to me…Ok ok ok I’ll quit stalling…. But it is fun….


                    Remove the clamps in this order last one on each end, the third one from the end #5 one each end leaving the….. I’m sorry there’s no order just takem off…heheheheee


                    Just be careful to make sure the pressure strip isn’t accidentally glued to the bow, some times a small tear or hole will happen if the cling wrap is too tight and makes a hole. Here is my pressure strip 1/8th alum strip 1 ½ inch wide with a rubber strip and cork under that to allow for the expansion.


                    Almost ready, now before removing the center clamp cut all the tape that holds the bow in place.


                    It should just pop off now you see why we use the cling wrap, if not it would be part of the press for ever !!


                    Here is a better view of the bow and the glue that is squeezed out…


                    Now the fun Part removing the cling wrap


                    Ok lets remove the glue boogers a table sander works wonders. Now.. you see that very important piece of equipment I have on? Yeah the respirator, Buy one!! Its $20.00 well spent, the glue dust will trash your lungs… we want ya around for a long time!!!


                    And lookie there, all cleaned up nice tight glue lines and no gaps in the edges. That is a good feeling.


                    First things first, find the center of the riser again mark it around the whole riser.


                    Ok now put the steel rule on zero and mark where the nocks will go, this also the length of the bow plus the tips so add for those and mark the total length and nocks on both ends.


                    Now put on the stringcenterfinderthingmajig jig, it’s a sophisificated piece of equipment and I sell these for $49.95 plus $15.00 S&H (it a string with a fishin weight on each end)


                    Move it back and forth to find center on all three points both ends and center.


                    Mark center and also the limb tip width, mark each side for the limb edge do both ends.


                    Mark the center of the riser and center at the end of the fade outs, also the width of the riser.


                    Double check the cut off mark and mark it dark so you don’t cut the string nock by accident… I mean I’ve never done it but, Uhhhh people have…


                    Cut the bow to length…


                    Now sight down the bow and look at the over all appearance of the bow does it look twisted? It’s shouldn’t but it’s good to check anyways.


                    Ok put the centerfinderthingamajig jig back on and double check your center marks…The scribe them on the glass, center is forever.. Do both ends


                    Now the riser, I like to make my risers about 1 1/8th wide, just my preference, you can go thinner or wider if you like mark the width at center and at the fadeouts, draw it in pencil


                    It’ll look like a perfect rectangle my riser working area is 13 inches with this riser length


                    Mark the limb tip width in pencil.


                    Using a steel ruler mark the limbs in pencil why pencil? A scribed mark on glass is forever…


                    Ok, I like how it looks, I’m happy with what I see lets make it forever..


                    Now scribe the glass with a scribe, this is the most exciting part….
                    One word of caution, scribe slow and with light pressure, the steel point will scratch the glass it will also cut the glass which has fibers inside.. I’ll show ya in a few minutes just scratch a line you can see.


                    This is the point of no return it’s forever…HOT DANG!!!!


                    Ok change to an old band saw blade the fiberglass with trash your blade in one inch of travel. Don’t put on a new one, it will squeal, smoke and scream just cut slow and on the outside of the line. We will sand to the line in a few minutes…


                    This is a bow blank what a great feeling…


                    Ok on we go now back to the sander and sand to the line, take your time, it’s easy to take it off but its hell to put back on!!


                    Remember a few minutes ago I said don’t scratch hard, we I did to show you why you don’t do it. See the hairs?


                    Do not pull on the hairs, it will pull and get bigger and actually run into the fiberglass on the back and ruin your bow. So when you get to this point sand lightly till they are gone.


                    Sight down the edges and see if it looks straight and also admire your skills


                    The next set of pictures is marking the string nocks and filing them, I use a small file then go to a larger file, I do it by eye, you can mark them at a 38 degree angle and file away.


                    Make the grooves just deep enough for the string to fit in, they must be even, square and same depth or they will make the limb twist, this is probably the most frustrating part of the build. But you can do it just go slow.


                    Now let’s string it and see what we have

                    JUST KIDDING it’s not that hard.

                    Ok here we go


                    Oh YEAH!!!! Looking good I like the shape and profile


                    Now put the tip on the bench and hold the other tip on your finger and sight down the string, if all is good it should be tracking right dead center through the riser and limbs


                    See told ya it was fun… are ya excited yet?

                    Ok let’s check the tiller to see which end is which. Snap on a bow square on the string and slide it to the end point of the fadeout and it’s…… 8 and ½ inches…


                    Now to the other end… Let’s see just shy of 8 and 3/8th ok this is bottom so far


                    Mark it so we don’t get confused......... KISS


                    Now let’s check the dynamic tiller, cut a draw stick 18 inches long put it on the riser so it draws the bow 18 inches. Now keep the tape measure parallel to the stick and measure, the bottom (which we marked should measure less than the other side


                    Ok I put on my tip over lays on at this point, so I can also continue working
                    I make 1 ¼ inch mark below the string nock and put a piece of taper there to keep the glue from getting on the bow, (do both ends)


                    Rough up the glass with 120 grit and do the same for the over lays


                    Pre-fit the over lay to match the curve of the limb. don’t glue it on straight it might produce a limb twist. Sand and shape to fit and mix up some Smooth on and glue both on


                    Ok we’re almost there, Lets mark the riser shelf, I make mine 2 inch above center, this is my arrow shelf( it fits my hand, yours might be more or less)


                    Mark the shelf to center of the bow and I make my window 3 inches tall


                    I free hand the window shape


                    Time to cut it out, back to the band saw cut slow to the shelf line


                    I cut the shelf with a hacksaw (won’t fit on the band saw)


                    I always radius my shelf so cut the ends off too


                    There.... Now ya got it all cut,


                    Looks like crap uh?


                    Well a little file and rasp time, little off here and round that.... and fit the hand here, leave that... and in no time at all it looks like this.


                    Another view


                    Now into the oven for the Smooth on to cure on the limb tips. And let cool over night

                    I’m not going to make ya wait though..

                    Shape the tips on the sander and then I use files and rasps and finish them


                    And the final product


                    Nothing fancy, just a small non intrusive tip that doesn’t add weight


                    Let’s go see what we have, I have a group of arrows that I use to see how well the bow shoots. light arrows, heavy arrows, stiff spine, weak spine… every thing, all of my bows must be able to shoot them all.


                    I then do a final sanding with 150... then to 200. then I either use Truoil, or Helms or Thunderbird.

                    When I'm finished with my shootability tuning(make it shoot where I'm lookin) then I'll write on the bow, it'll have a name, length and weight.

                    Maybe my name as I'm Know as on other sites "Greywolf"


                    So that's how it's done. Thanks for watchin and maybe I have made a couple of ya want to take the plunge to make your own.
                    But, at least ya got a taste of what happens in a Bowyers world and how I relax after a long stressful day.

                    Aloha Nui Loa
                    Last edited by Greywolf in Hawaii; 09-03-2010, 01:21 AM.

                    Comment


                      #40
                      Greats build, Mark! Thanks for sharing.

                      Bisch

                      Comment


                        #41
                        Mark,

                        On your limb tips. How far down are you supposed to or should you go before you put in your string grooves?

                        Is there a general rule as to how thick limb tips should be?

                        Thanks again!

                        Comment


                          #42
                          Awesome bow there Mark, as usual Mahalo nui loa for this.

                          Aloha
                          Jon

                          Comment


                            #43
                            Originally posted by Blue Tick View Post
                            Mark,

                            On your limb tips. How far down are you supposed to or should you go before you put in your string grooves?

                            Is there a general rule as to how thick limb tips should be?

                            Thanks again!
                            You hear of a 62 inch longbow? depending on who the bowyer is it. might be nock to nock or over all. the longer the bow the smoother the draw for most people. IMHO.

                            The shorter the bow the more finger pinch you experience, with my stubs for fingers, 58" causes me pain with finger pinch. unless you draw less than 28 then it's ok. Knuckle draggers should shoot a longer bow

                            Some say a longer bow isn't good for tree stand hunting I say Bull, It's a built in excuse for a miss!
                            But that's my opinion. That and $6 will get you a cup of Starbucks coffee.

                            62-64-66 are all common lengths for a longbow.
                            As far as limbtips I like a little beefier tips a full 5/8th at the nock (or shade over)

                            But ask 3 bowyers you'll likely get 3 different answers, no one is 100% correct, it's up to you and what you want/like/build.

                            Comment


                              #44
                              Thanks Mark....wealth of knowledge and I appreciate the tips and help. Were you able to find any pics of that oven by chance?

                              Comment


                                #45
                                Nope, I have no clue where it went, I looked for the post but the site wouldn't let me copy the picture of another oven which is plywood and a door layed on top.

                                As long as it keep the heat in and reflects the heat bask into the box it'll be good and "less expensive" meat thermometer will let you know how hot it gets on the inside.

                                Mine is out of 1/2 inch plywood 24 inch sides and 12 inches wide on the inside.
                                I used heavy cardboard with heavy duty Alumium foil glued on it. I used spray adheasive to stick it to the sides and bottom I wired in 4 light bases in the top and used a 6 foot long piano hinge.

                                I did use weather strips to seal the lid from heat loss, if its windy I throw a drop cloth over the oven.

                                Comment

                                Working...
                                X