Ever have one of those bows that was just about perfect…… if….. If… the handle was more of this or less of that.
Or the limbs didn’t bend so much? And so “if” becomes a “thing” with that bow? It did with me. So I decided I want a bow that I liked, The handle of this one, limbs of that one and the limb tip curve of that one over there hangin on the wall.
So on the lid of my heat box that’s, exactly what I did, I drew my “perfect bow”. Then I decided I need to build it, to see if it shoots like it does in my head(perfect or close to it)
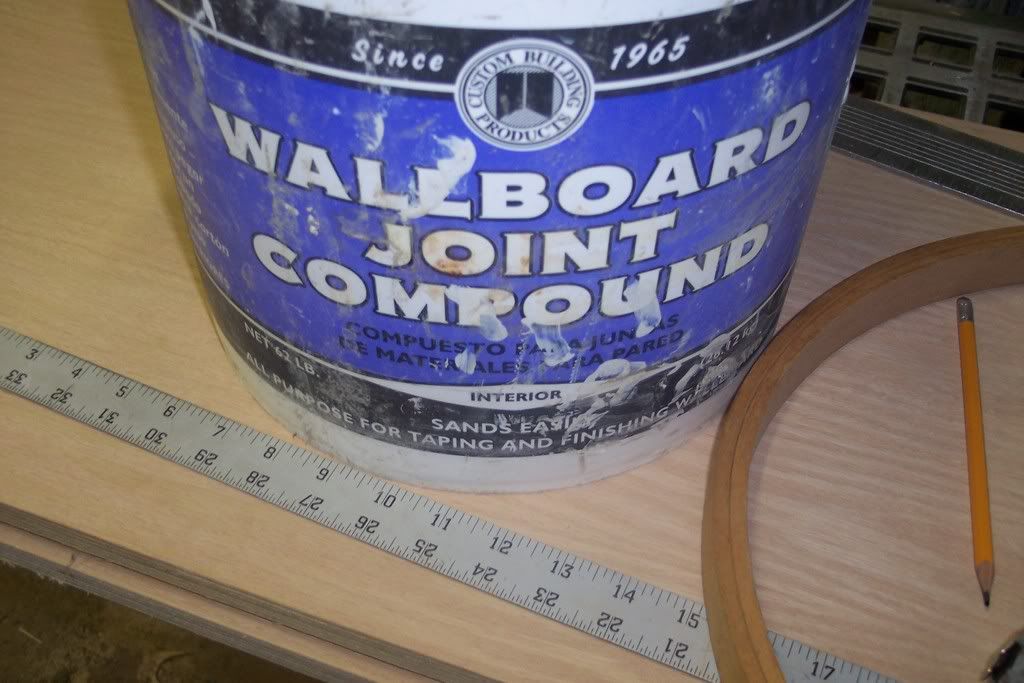
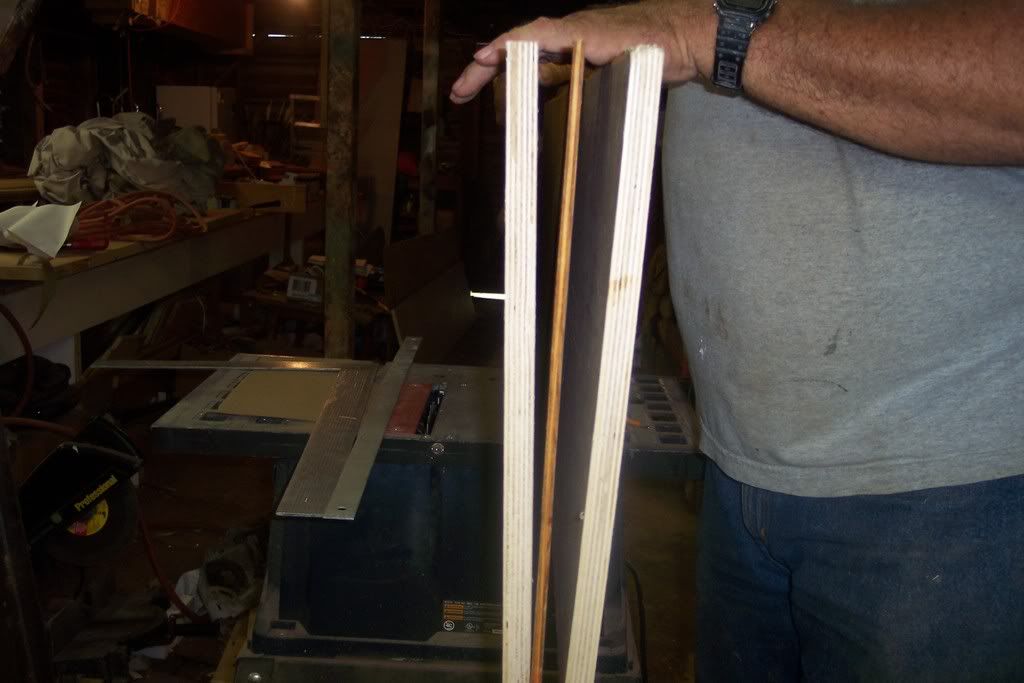
I went to Home Depot and bought some ¾ Oak plywood, had it ripped into 3 15 7/8s" pieces wide pieces.(I usually buy Birch but it was junk)
In the truck they went and away I went. I know how hard designing a bow can be.
Bowyers use sophisticated Computers, CNC, deflex meter machines, and machines I can’t even begin to spell their names. But that wasn’t going to stop me, so I dug into my own stash of sophisticated tools. If O.L. can build one daggonit, so can I.
So I rummaged through my stuff and found almost every tool I’d need, So lets build a recurve, lets go start to finish.
First my bunch of sophisticated design tools, A Quilting hoop for the limbs, a straight edge for the riser and line marking device, a tape measure for accurate measuring and a drywall mud bucket for the limb tips, and what ever else I might have in the cave.
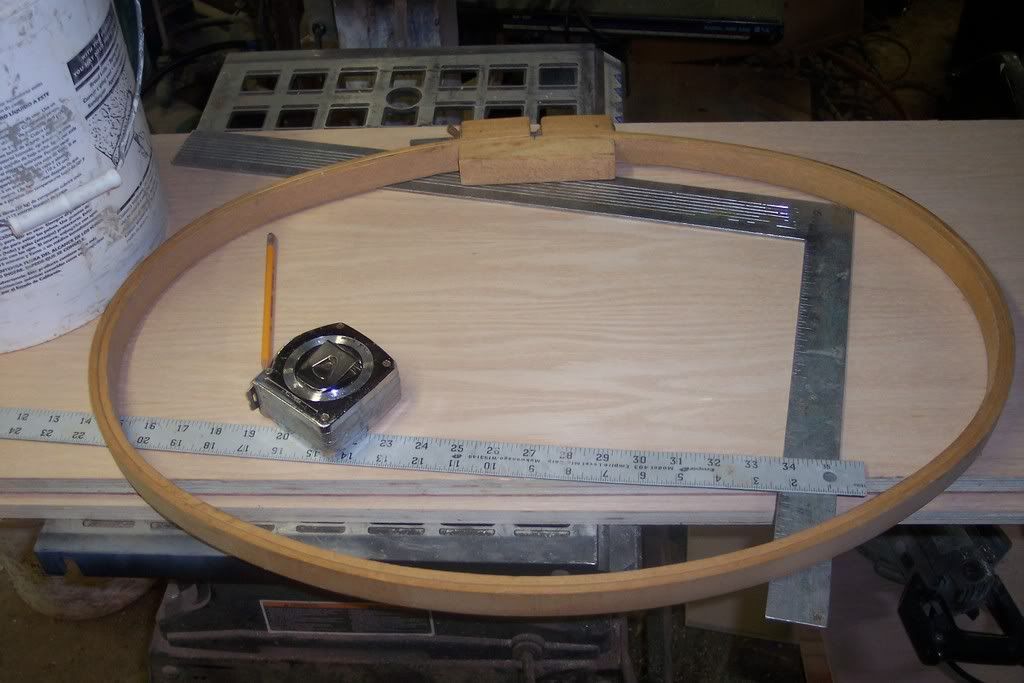
Remember it has to be a drywall bucket or it’ll not …….well nuff said
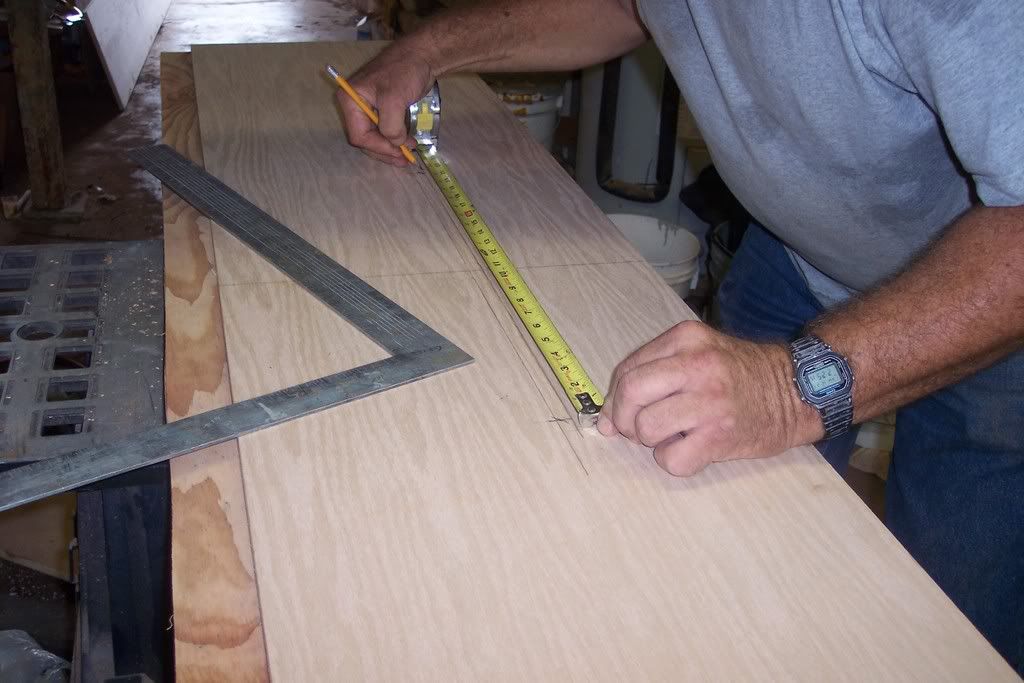
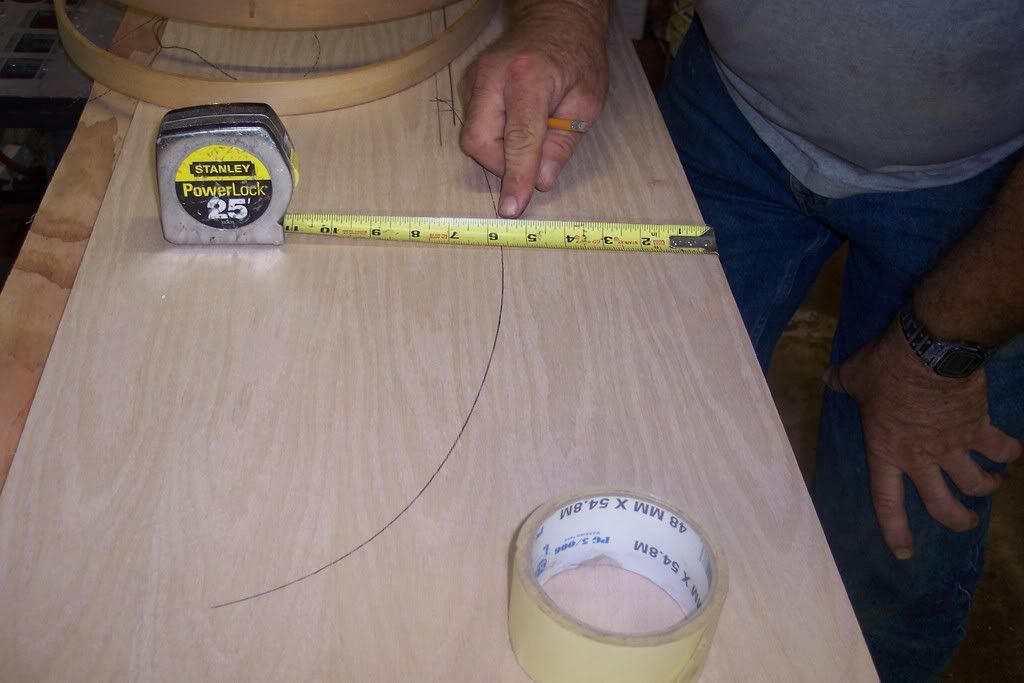
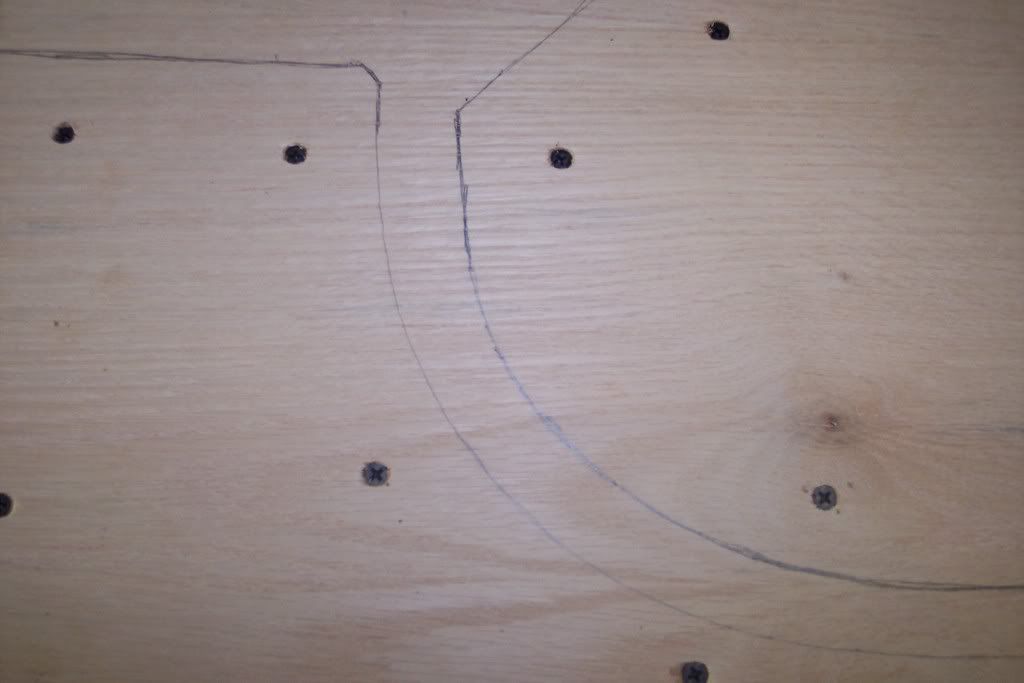
Ok, lets get started, First we need base lines, everything comes from these two important lines, for this one, I used 36 inches as a center base line, the form ply is longer, but 36 inches is the base line.
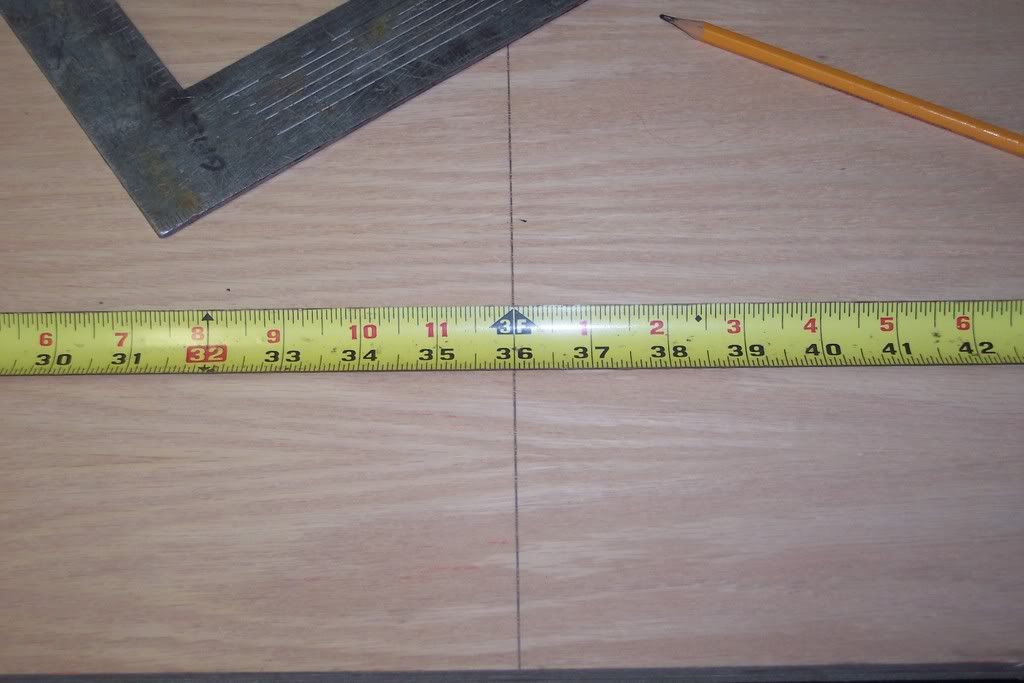
Now for the length base line height, I chose 7 inches, remember the base line stays, but the limb lines will go above as well as below the base line, so give yourself plenty of room.
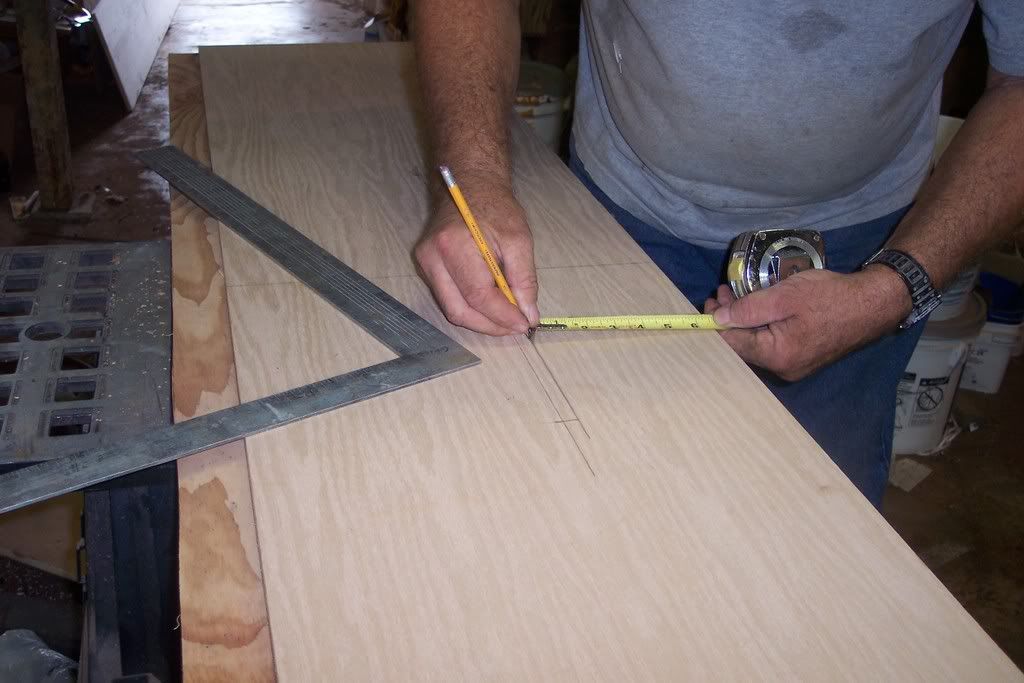
First I lay out how long the riser is going to be. This one is going to be 20 inches from fade out to fade out. I can also shorten it to 18” or 19” if I like, or squeeze out 21” or 22” if I want a longer riser.
The riser is a modified Bingham’s design forward style riser, like I said “If it was just a little different” little too forward now it is to my liking.
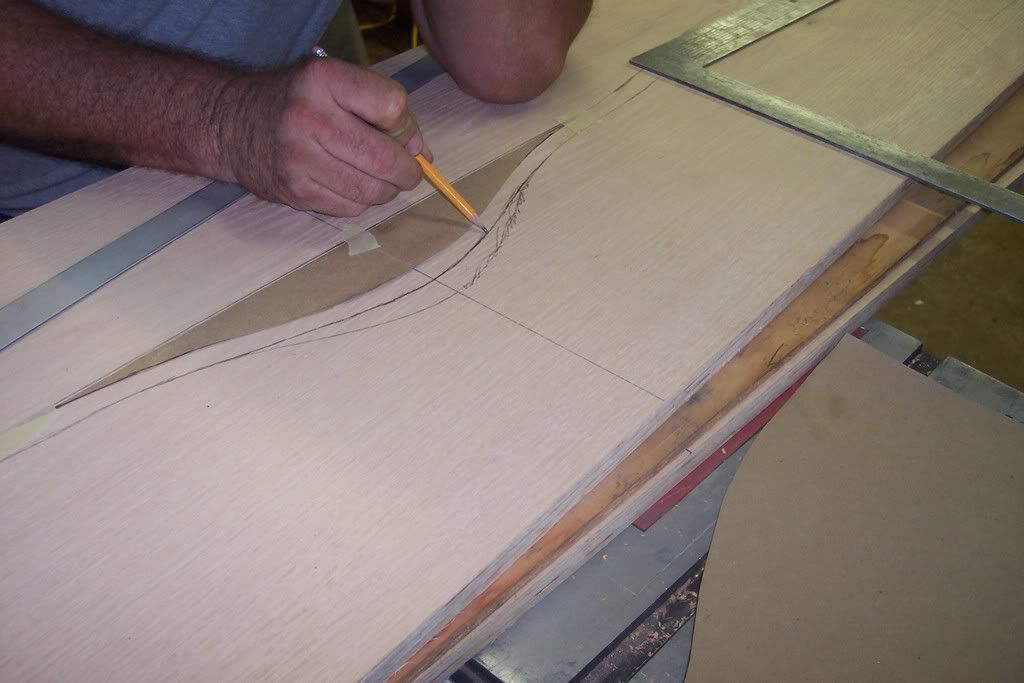
Ok lets put some limbs on this bow, I like the curve of the Hoyt Hunter limbs, nice gentle accelerating design, hard to free hand draw so I used the Alpha Females oval quilting hoop and just about got just what I wanted…… sorta… it needs some modification too.
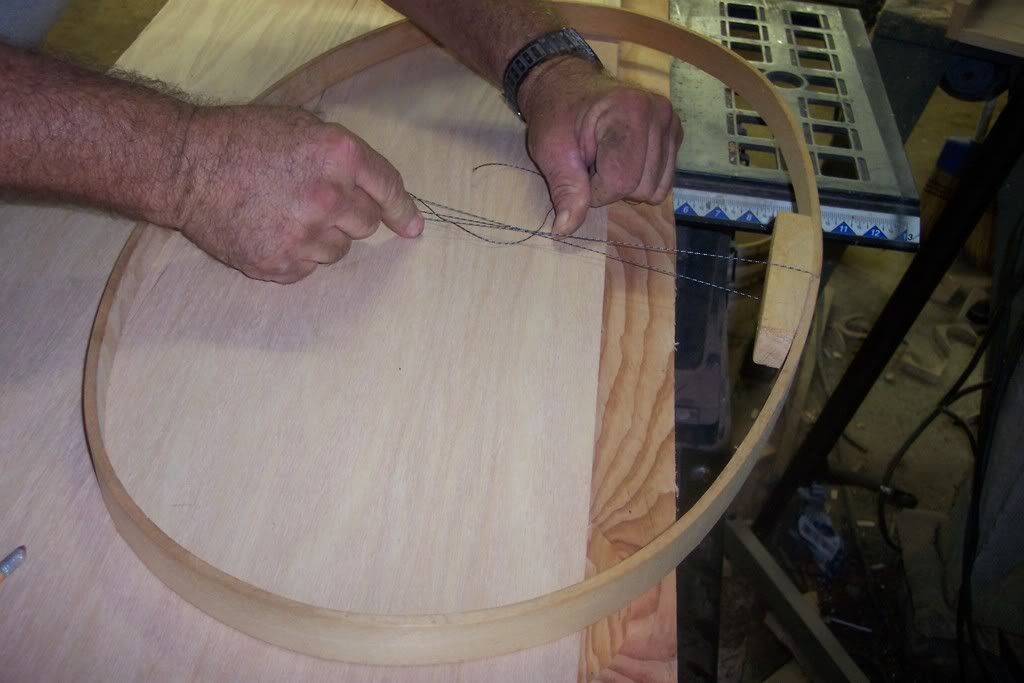
I used black and white braided center serving thread (very important to use black and white) to pull the hoop so it bends a little faster than just the hoop naturally had. so I tie the top and bottom together and pulled real hard bend the loop and tie a square knot.
I laid the hoop on the limb and marked how long the limb was, I marked it all the way across both side so I can flip it over to use on the both ends.

And do the other end too, everything is done exactly on both ends. Later on you can design your own and change the upper and lower limbs if you like. I like these.
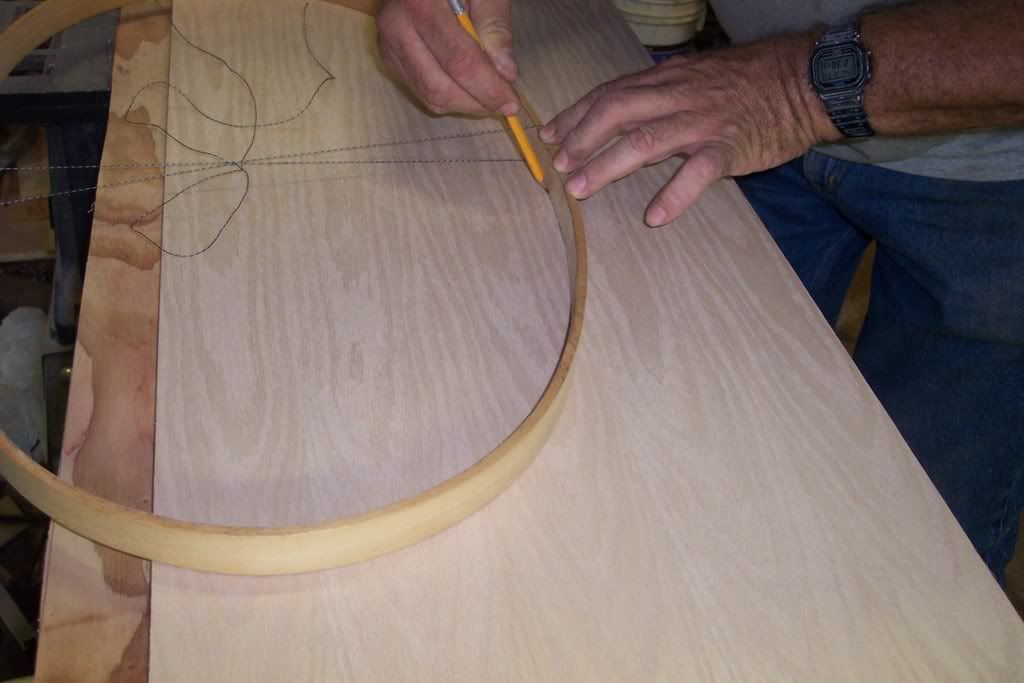
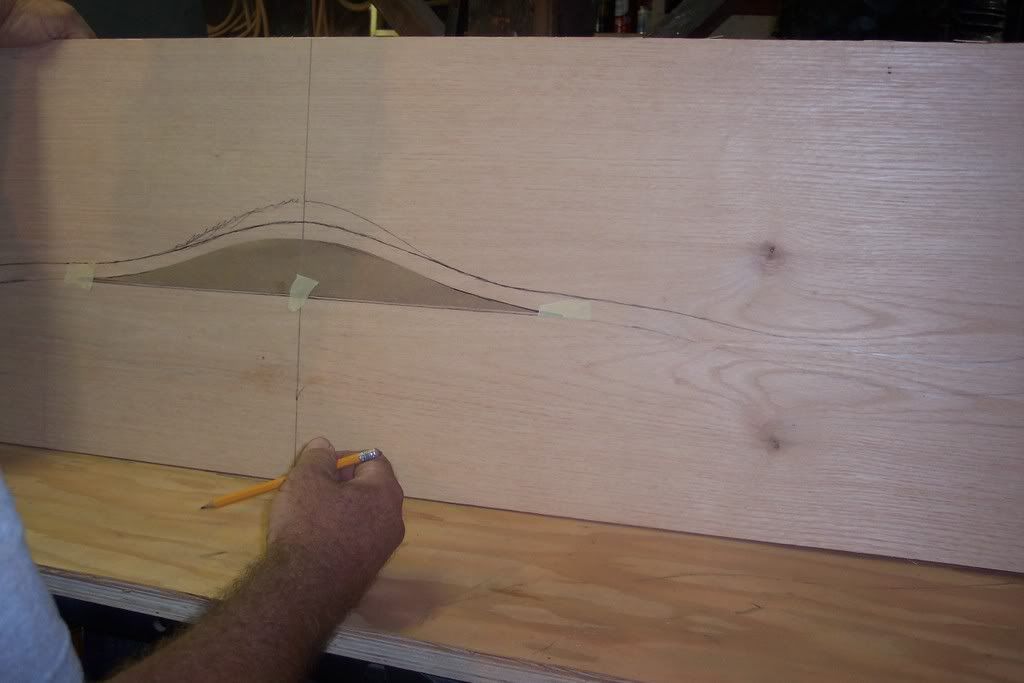
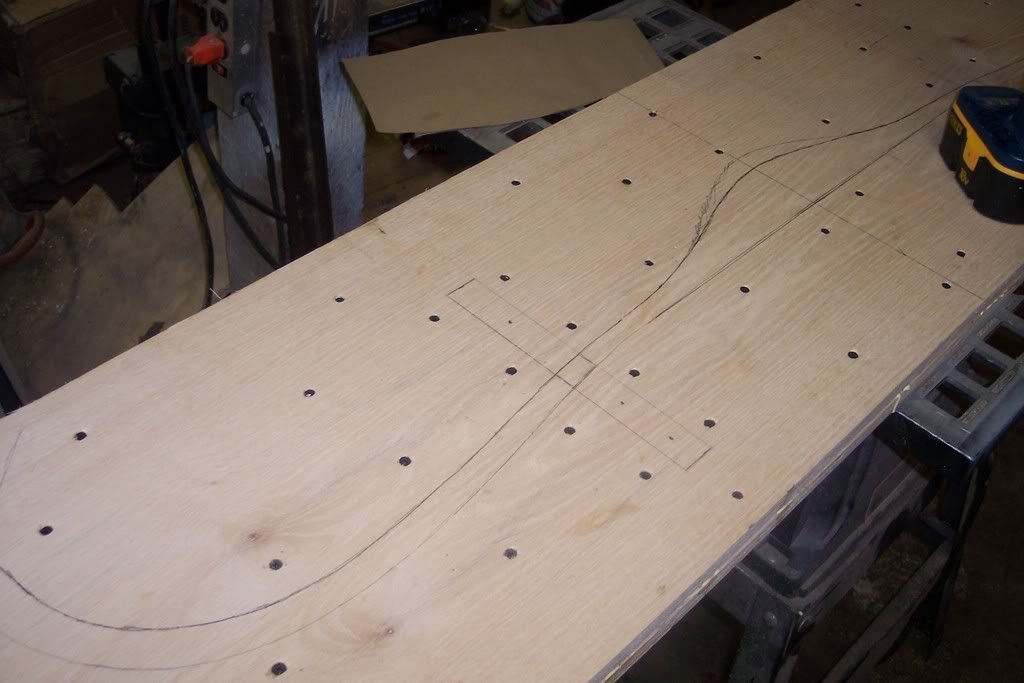
You should have something that looks like this, crude I know but Hey, we're designing a recurve from scratch .
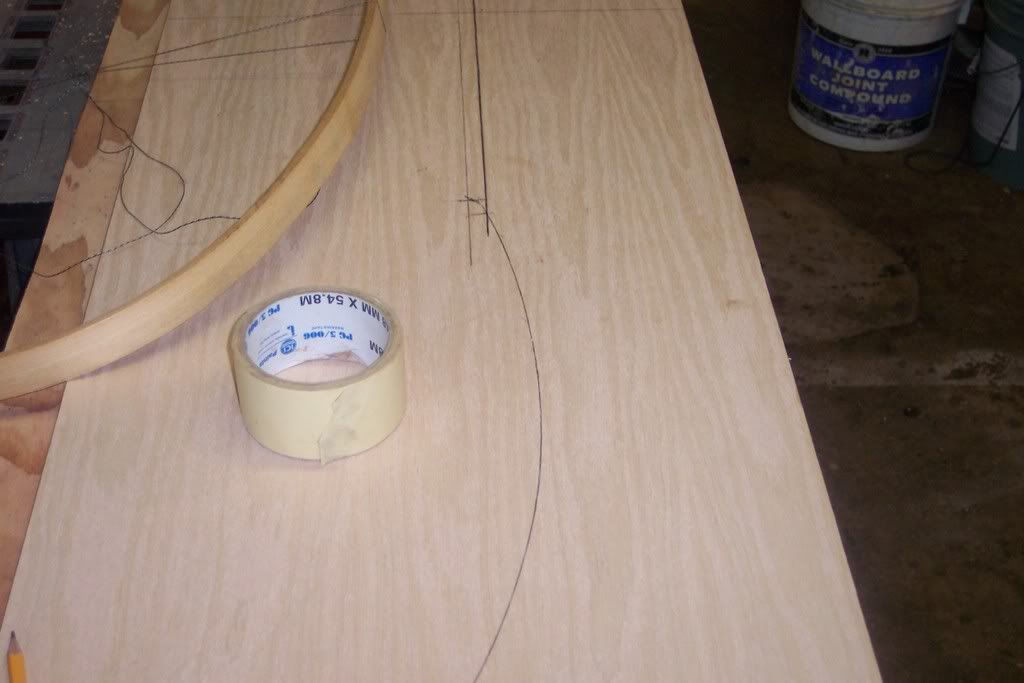
Before we “freehand blend” the limbs into the riser, measure from the base lines, everything is exactly the same on this bow………..I guess………should be if we did it right…
I forgot to take a picture of the bucket making the final limb tip , sorry bout that, but It happened.
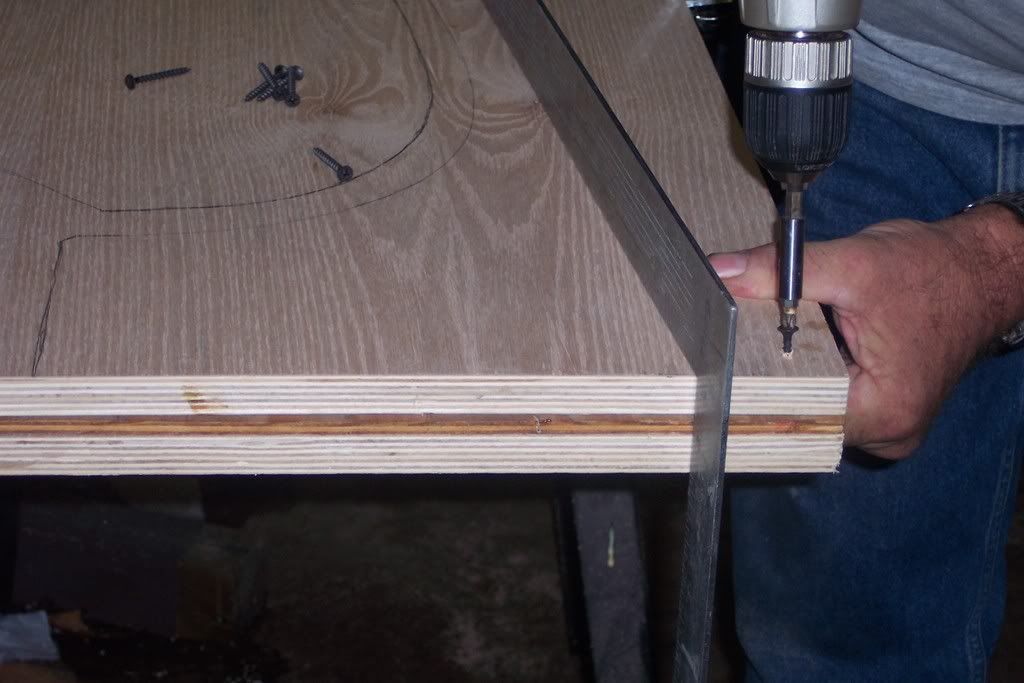
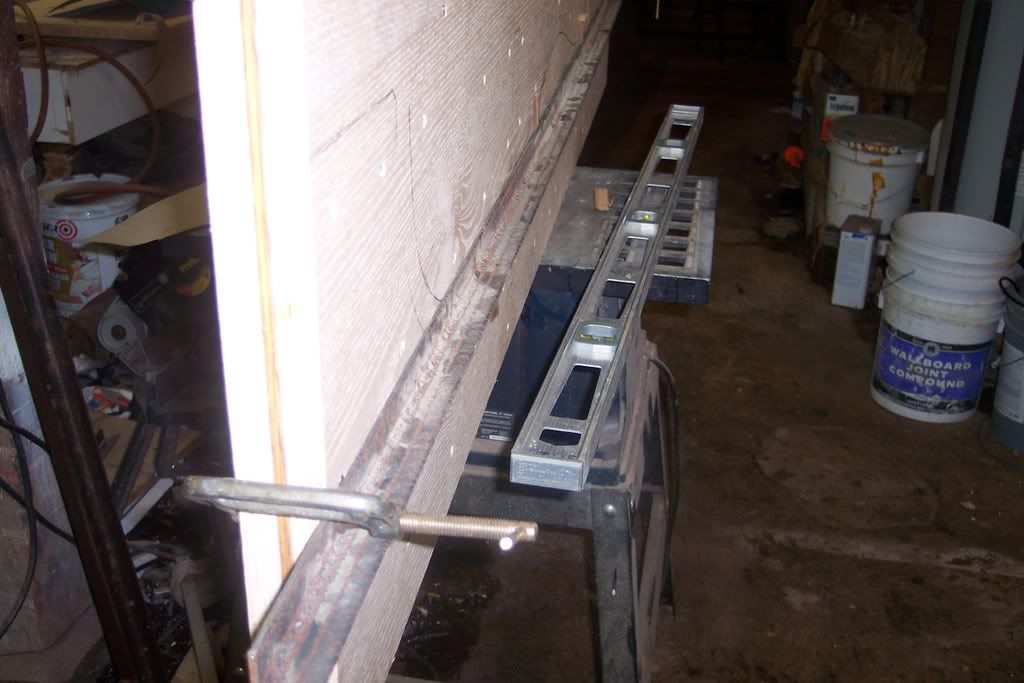
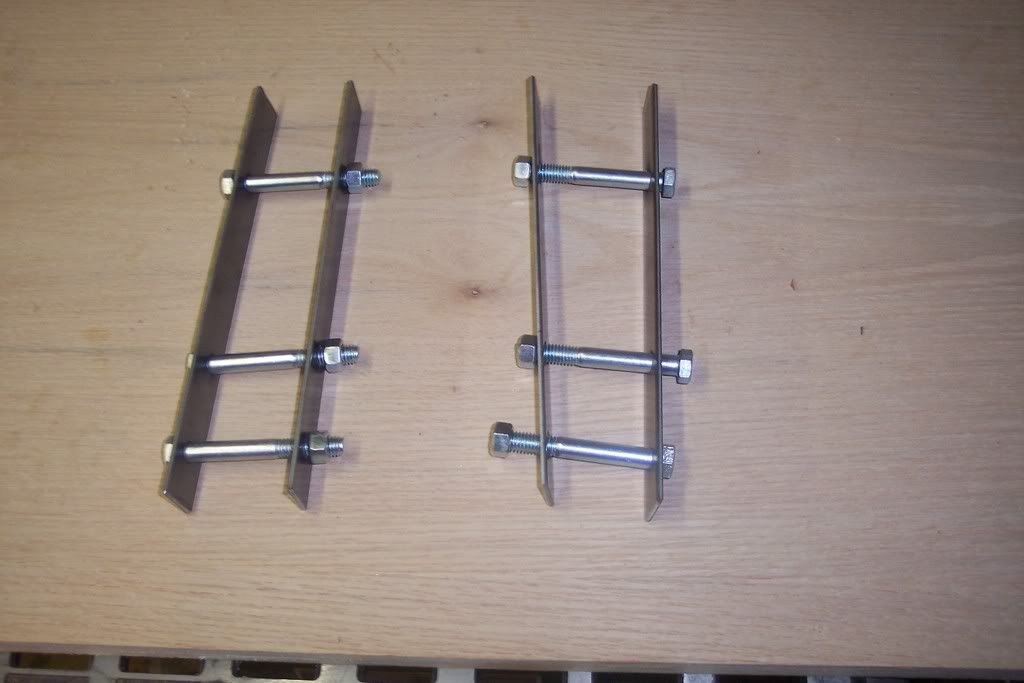
Now that the blending is done, Good job by the way, we need to make this a "workable" form which means we need to have a top and bottom (2 piece form)for this bow, I'll use a fire hose for clamping or holding system.
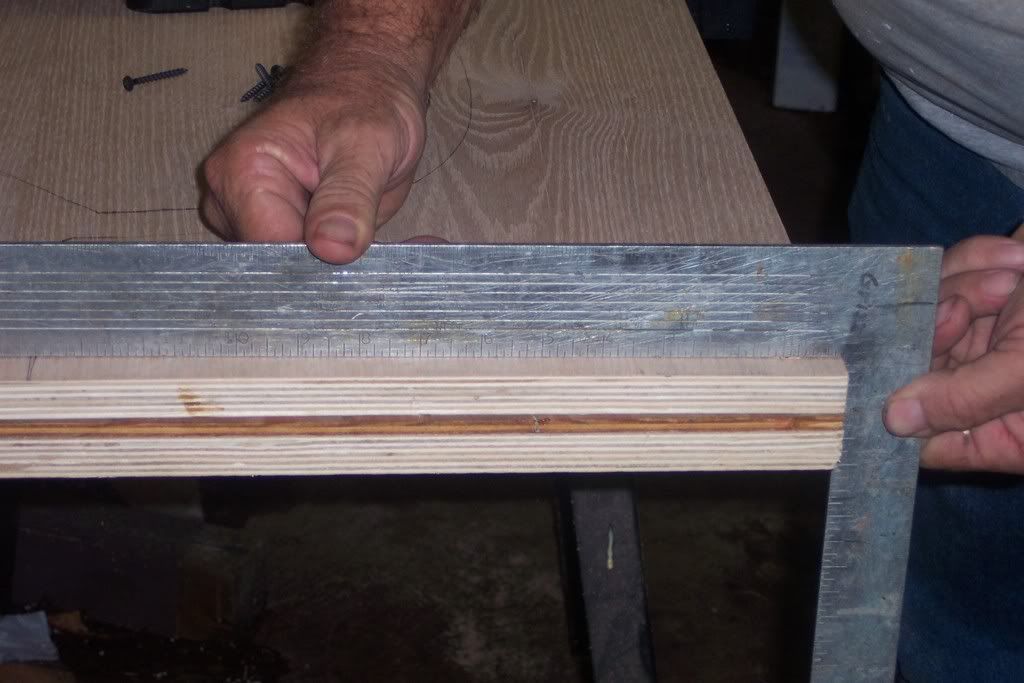
Mark out the Max length of the bow add a half inch and square off the form. this is so we don't have to have a 8 foot long fire hose.
Take a ¾ inch scrap of wood and using the bow line on the form trace a “air gap” space all along the limb bow line. This is the space above the bow once all the pieces are put together to make the air hose squeeze it together when inflated. You'll see....
Lets do the riser, the original riser is way to pronounced for me, I don’t do HIGH wrist grips, Why? just don’t!
Your hand doesn't normally bend that way. So I lower it by an inch or so…. Now I like it, it “fits” me ,so allow ¼ inch for the belly tapers and glass, then draw the riser in place.
Maybe the old from pattern might work………..uhhh nope to high…. Freehand time! see it's all starting to come together.
Same thing, we need a “air hose gap” over the riser but make this just a ½ inch instead of ¾ inch, it’ll be a tighter fit when and if we decide to lengthen the riser there will still be enough of a gap. Great Idea Huh? Who said I was dumb?
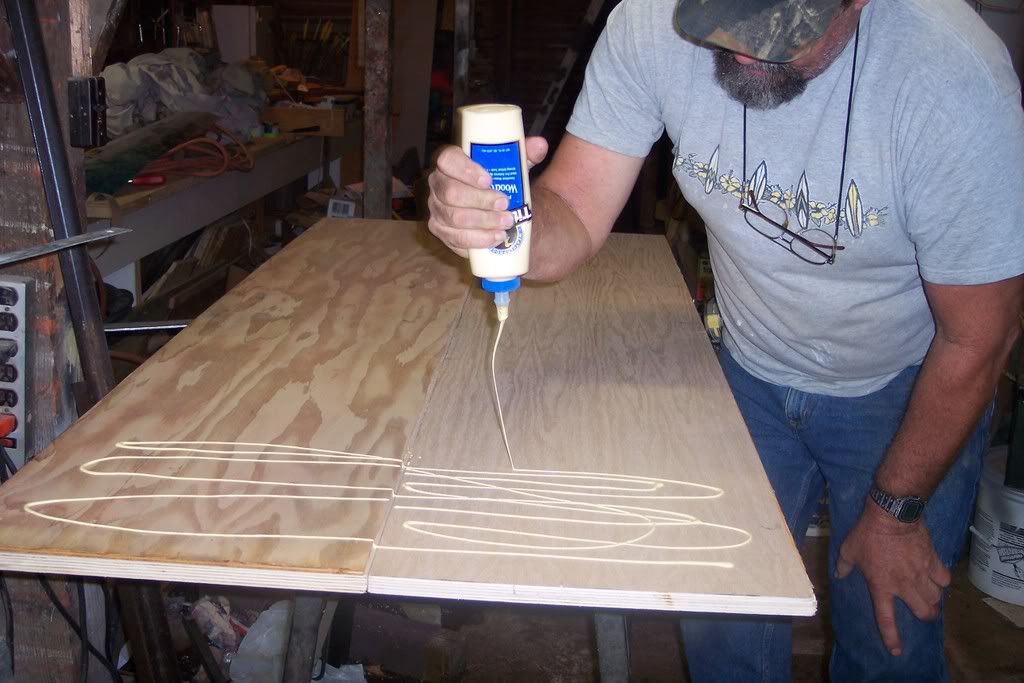
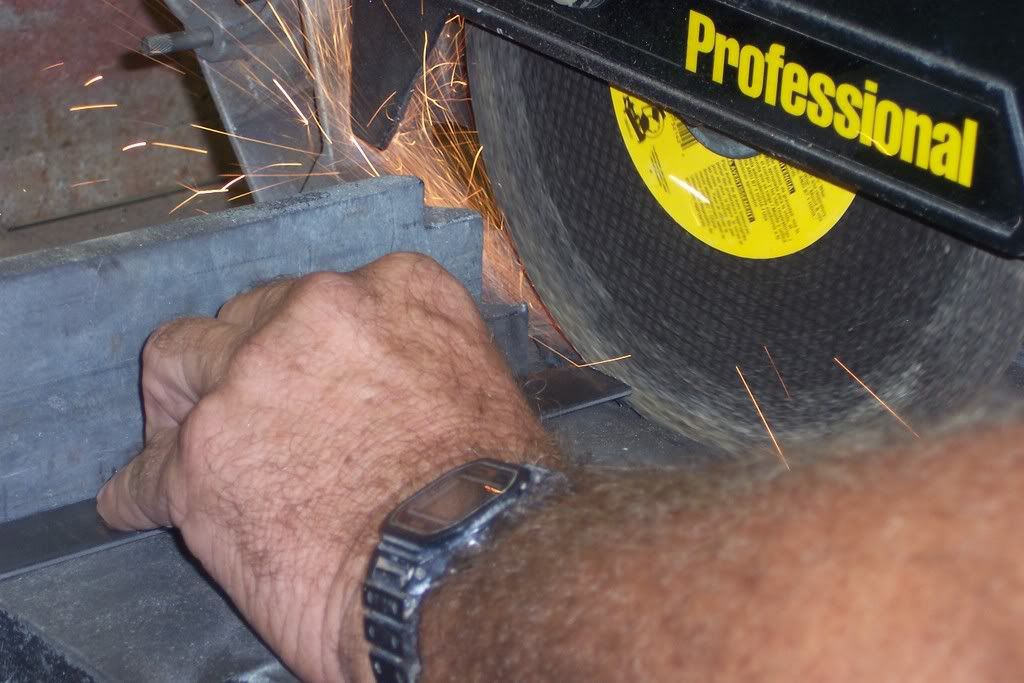
Ok, lets make this a press, We need to glue both ¾ inch plywood pieces and we need to put a ¼ inch piece of plywood same width sandwiched in between that, Should make it the full 1 ¾ inch wide limb I’m looking for.(just stack a bigger center ply for a wider limbs or leave out the center for 1 1/2' limbs... cool huh?)
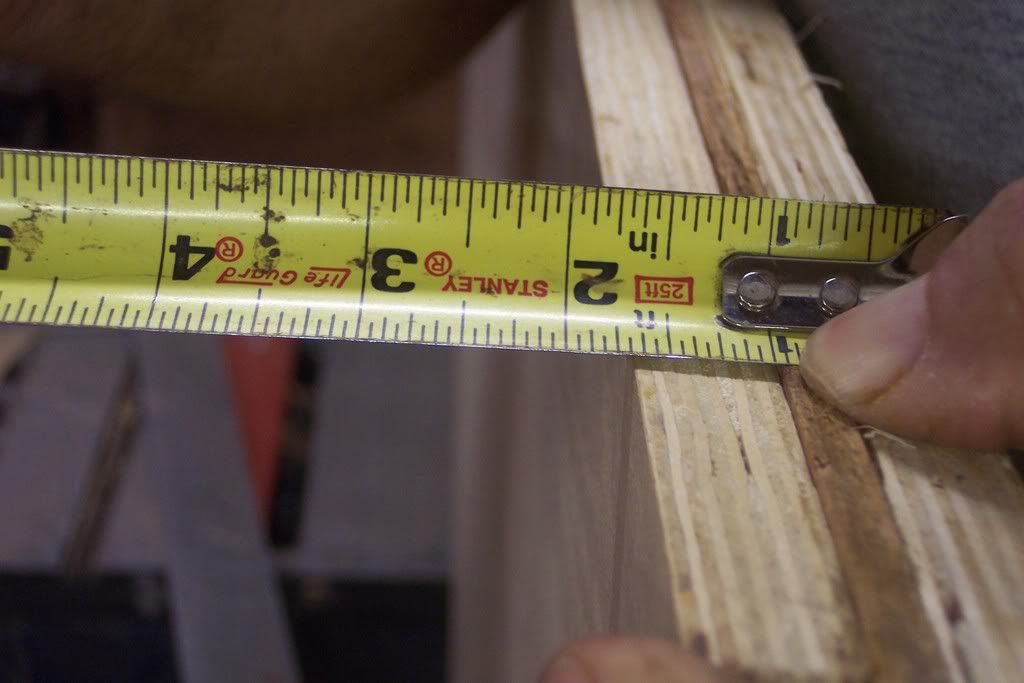
Oh with today metric measurements ¾ ply wood isn’t ¾ inch thick. I came up 1/16th shy.... not a big deal the lams I’m going to use on the press will make up for it.
Tomorrow we glue and screw the press together, it’ll become clear why I drew the bow on the press first.
Stay tuned it’s gonna be one heck of a fun ride
If ya have any questions ask, Sometimes things don’t always come out in print the way they do in my head.
Or the limbs didn’t bend so much? And so “if” becomes a “thing” with that bow? It did with me. So I decided I want a bow that I liked, The handle of this one, limbs of that one and the limb tip curve of that one over there hangin on the wall.
So on the lid of my heat box that’s, exactly what I did, I drew my “perfect bow”. Then I decided I need to build it, to see if it shoots like it does in my head(perfect or close to it)
I went to Home Depot and bought some ¾ Oak plywood, had it ripped into 3 15 7/8s" pieces wide pieces.(I usually buy Birch but it was junk)
In the truck they went and away I went. I know how hard designing a bow can be.
Bowyers use sophisticated Computers, CNC, deflex meter machines, and machines I can’t even begin to spell their names. But that wasn’t going to stop me, so I dug into my own stash of sophisticated tools. If O.L. can build one daggonit, so can I.
So I rummaged through my stuff and found almost every tool I’d need, So lets build a recurve, lets go start to finish.
First my bunch of sophisticated design tools, A Quilting hoop for the limbs, a straight edge for the riser and line marking device, a tape measure for accurate measuring and a drywall mud bucket for the limb tips, and what ever else I might have in the cave.
Remember it has to be a drywall bucket or it’ll not …….well nuff said
Ok, lets get started, First we need base lines, everything comes from these two important lines, for this one, I used 36 inches as a center base line, the form ply is longer, but 36 inches is the base line.
Now for the length base line height, I chose 7 inches, remember the base line stays, but the limb lines will go above as well as below the base line, so give yourself plenty of room.
First I lay out how long the riser is going to be. This one is going to be 20 inches from fade out to fade out. I can also shorten it to 18” or 19” if I like, or squeeze out 21” or 22” if I want a longer riser.
The riser is a modified Bingham’s design forward style riser, like I said “If it was just a little different” little too forward now it is to my liking.
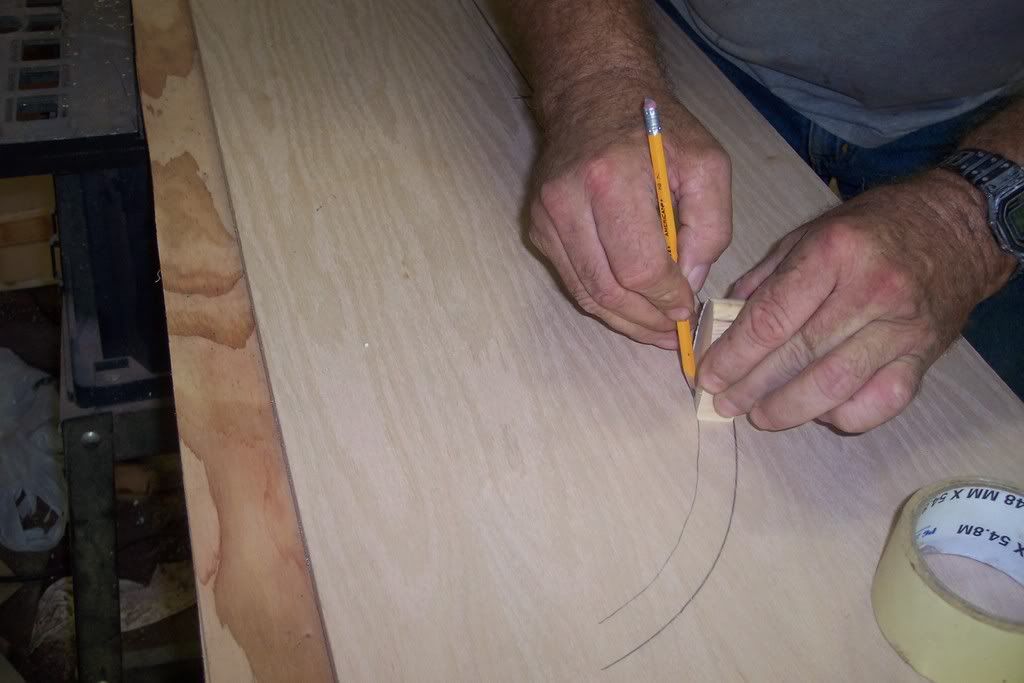
Ok lets put some limbs on this bow, I like the curve of the Hoyt Hunter limbs, nice gentle accelerating design, hard to free hand draw so I used the Alpha Females oval quilting hoop and just about got just what I wanted…… sorta… it needs some modification too.
I used black and white braided center serving thread (very important to use black and white) to pull the hoop so it bends a little faster than just the hoop naturally had. so I tie the top and bottom together and pulled real hard bend the loop and tie a square knot.
I laid the hoop on the limb and marked how long the limb was, I marked it all the way across both side so I can flip it over to use on the both ends.
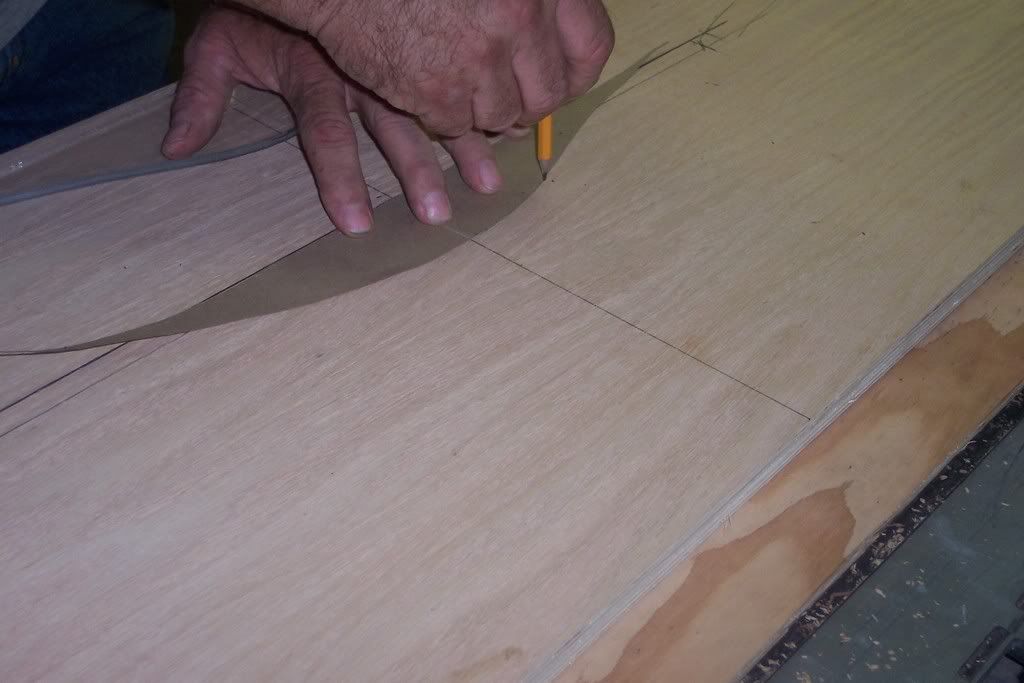
And do the other end too, everything is done exactly on both ends. Later on you can design your own and change the upper and lower limbs if you like. I like these.
You should have something that looks like this, crude I know but Hey, we're designing a recurve from scratch .
Before we “freehand blend” the limbs into the riser, measure from the base lines, everything is exactly the same on this bow………..I guess………should be if we did it right…
I forgot to take a picture of the bucket making the final limb tip , sorry bout that, but It happened.
Now that the blending is done, Good job by the way, we need to make this a "workable" form which means we need to have a top and bottom (2 piece form)for this bow, I'll use a fire hose for clamping or holding system.
Mark out the Max length of the bow add a half inch and square off the form. this is so we don't have to have a 8 foot long fire hose.
Take a ¾ inch scrap of wood and using the bow line on the form trace a “air gap” space all along the limb bow line. This is the space above the bow once all the pieces are put together to make the air hose squeeze it together when inflated. You'll see....
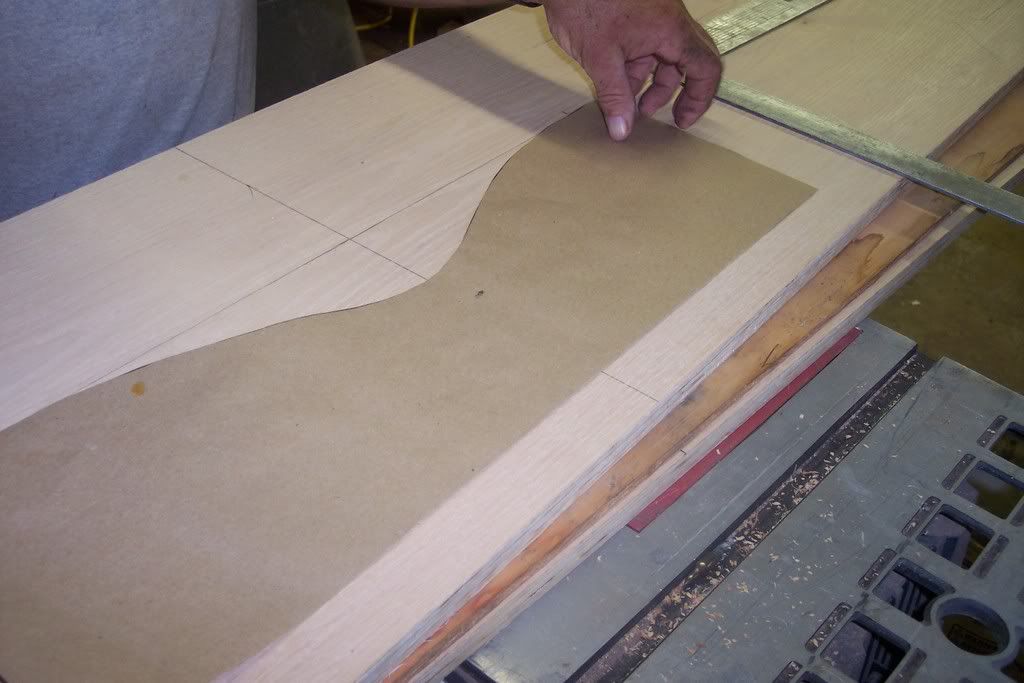
Lets do the riser, the original riser is way to pronounced for me, I don’t do HIGH wrist grips, Why? just don’t!
Your hand doesn't normally bend that way. So I lower it by an inch or so…. Now I like it, it “fits” me ,so allow ¼ inch for the belly tapers and glass, then draw the riser in place.
Maybe the old from pattern might work………..uhhh nope to high…. Freehand time! see it's all starting to come together.
Same thing, we need a “air hose gap” over the riser but make this just a ½ inch instead of ¾ inch, it’ll be a tighter fit when and if we decide to lengthen the riser there will still be enough of a gap. Great Idea Huh? Who said I was dumb?
Ok, lets make this a press, We need to glue both ¾ inch plywood pieces and we need to put a ¼ inch piece of plywood same width sandwiched in between that, Should make it the full 1 ¾ inch wide limb I’m looking for.(just stack a bigger center ply for a wider limbs or leave out the center for 1 1/2' limbs... cool huh?)
Oh with today metric measurements ¾ ply wood isn’t ¾ inch thick. I came up 1/16th shy.... not a big deal the lams I’m going to use on the press will make up for it.
Tomorrow we glue and screw the press together, it’ll become clear why I drew the bow on the press first.
Stay tuned it’s gonna be one heck of a fun ride
If ya have any questions ask, Sometimes things don’t always come out in print the way they do in my head.


Comment