Announcement

Collapse
No announcement yet.

Need critiques - another photography class assignment

Collapse
X
 
  • Filter
  • Time
  • Show
Clear All
new posts

    #16
    Great post, Kevin. A tripod and release are HUGE helps. Even if you want to go the HDR route, you definitely need that setup to ensure getting exposures that are identically framed. If you want to eliminate motion blur, you can use HDR. If you want to include it, then a long exposure is cool.

    More than one way to skin a cat. Makes it fun.

    Comment


      #17
      Notice that in Kevin's shots (which are great shots) there are black tops on the buildings because he had to sacrifice the light to keep from blowing the exposure. Had he exposed and took 6 or 8 different shots (without the moving people) then he could have gotten the tops of the buildings, the sky and the rest of the dynamic range of the exposures of the scene.

      Wish he would have shot that and merged it HDR because they would have went from good to great

      Comment


        #18
        Well, he could have gone from great to a different kind of great.

        Seriously, I love those shots as-is. But they would have also been nice in HDR. Some shots do look better "regular", and some better HDR (to me). Sometimes I'm surprised by my preference after I process one both ways. I expect one to be better and I end up liking the other (both ways) sometimes.

        Comment


          #19
          another simple way to do the same thing as HDR is if you shoot in RAW format? you can go into your RAW file and make a number of different files at different exposures then use those different files to build your HDR image.
          I've always done it in layers the old fashioned way.

          Comment


            #20
            Just a point & shoot in manual mode shot. I managed to shoot this handheld with a 4 second exposure using the hood of my truck as a brace. Exposure was 4 seconds, f/3.5 with a 6.7 mm focal length at ISO 250. I couldn't dial down more ISO with this camera for this shot considering the conditions and if I had....it would have been too much to handle. I held my breath and made it count shooting over moving cars on US 290 just slightly east of Johnson City. This was shot with my Olympus 770 SW...left the DSLR at home this day and wished I hadn't. Several tripods live in my truck just in case now.....forever forward.....alway prepared.


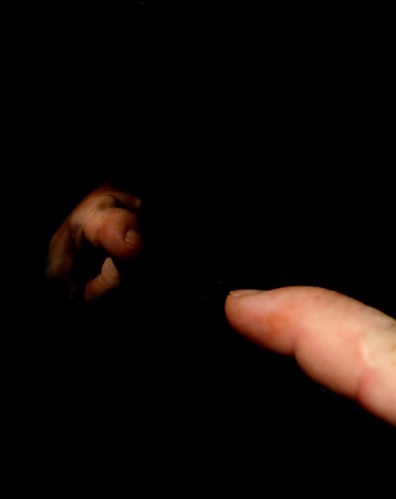
            Another low light shot with my D350 2 years ago. This pic is kind of complex...in many ways. I was visiting my old High School running buddy at his home NW of Austin, sipping a few brews and waxing away. He mentioned he built a Tesla Coil and had it out in his barn. So we immediately went out and fired it up. With the lights off and power on the sparks started to flow everywhere. He dropped the power down and held his hand up to one chrome plated panel when I captured this shot. The light provided in this pic was generated by electrical arcs above and beyond the view of my lens. Right after I snapped this pic he had one bolt make contact to the tip of his finger but I couldn't dial the lighting in well enough during that micro-second burst to capture it perfectly. This is one shot that looked kind of cool. I have no idea what I setup for this shot but it is what it is and pulling it off without any form of light against the reflection (background) was pretty darn cool. He's more braver than I am around electricity and we had sparks flying around over our heads and over our shoulders during the shoot. The chrome plate was spherical and due to it's shape and angle eliminated anything else on the background. A strange medium indeed and I had no idea how this shot was going to turn out....must have been the brews and a few tequila shots?


            St Mary's Cathedral in Fredericksburg during a drizzly evening. The foreground light was way overpowering but it's effect caught the backgroud well enough to snag it's shadow. I shifted the shot over into a yellow hued B&W frame to tone down some of the excessive white from the original pic. It was slightly over exposed from the church front and leaving it as it was pulled away from the background shadow.

            ISO 100, 4 second exposure, tripod, f/9 at 29mm with a release.


            This shot was made in a rather odd lighting configuration. Shot at the Brunswick bowling alley in San Antonio during the 4 hour "Cosmic Bowling" dealio. The light was black light and I found I had to lean on 800 ASA, tripod, release, 1/30 f/2.8 at 18mm. Cropped out the clutter with an edge to wide for effect. The red dots on the bowling balls were reflections from a disco ball spinning several yards away. I timed the pattern to nail red and hit the shutter.

            Last edited by AtTheWall; 10-01-2008, 09:41 PM.

            Comment


              #21
              Kevin do you know the technique for "Keystone" correction in Photoshop?

              Comment


                #22
                LOL and Danny and Shane!
                I actually did take some bracketed shots on a few of the above but I haven't had time to mess with them yet. I am not saying HDR is the devil, just that for a class assignment its probably not needed.

                CaptJack,
                I tried messing with the lens filter in photoshop ( adjust for barrell effect etc..) but never liked the results. I will try good ole' keystone adjustment and get back with you! Of course, I can leave as-is and its a good reason for a better wide angle hehe

                Comment


                  #23
                  Kevin, the lens looks plenty good to me. I don't think you can fix the distortion on a wide angle lens shot by taking it with a more expensive lens. It just comes with the territory in the ultrawides. PS3 has a lens correction tool that does the keystone deal and then crops it down. You lose some of the triangles on the edges in the process, but it leaves everything that remains straight.

                  Comment


                    #24
                    Kevin - the basic technique is
                    Select All > Edit > Transform > Distort
                    grab the corners and start pushing and pulling until you get it where you want it
                    If you hit Ctrl-R it puts rulers on the edge of the frame and you can pull construction guide lines out to use as reference for you vertical and horizontal

                    I usually add some canvas to the file - then select the image with the marquee tool before I start pulling on the Distort - this gives you some room to play with the file

                    remember to clear you guide lines when you're done- View > Clear Guides and then hit Ctrl-R again to remove the rulers

                    I sold my 4x5s a few years ago and the only specialty lens I still have is a 50mm shift lens (PC correction) for my Mamiya 645s. With the above technique I don't need the shift function for architectural anymore
                    Last edited by CaptJack; 10-02-2008, 08:55 PM.

                    Comment

                    Working...
                    X